Using Photopolymers for Your 3D Printing Projects
On the surface, it appears that stereolithography and PolyJet are identical twins. They both use UV energy to cure liquid photopolymer, after all. But a closer look reveals they’re more fraternal than identical.
Despite sharing a similar printing foundation, they use different print methods to achieve a fully cured product. The divergent build styles mean these methods are not always suitable for the same applications, making it important to understand the differences between the two processes. Chief among those are resolution and size, manufacturing speed, materials and applications.
This article will dive into stereolithography’s and PolyJet’s respective traits and offer tips on maximizing effectiveness for both processes.
It’s All About the Process
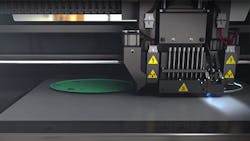
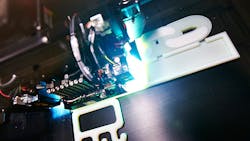
With its fine print nozzles depositing plastic photopolymer droplets, coupled with water-soluble support material onto a clean build platform, PolyJet prints somewhat similar to a 2D printer. The plastic is simultaneously deposited by the print nozzles and cured with UV energy. After completing a layer, the build platform lowers and the next layer is built on top of the previous one. This process repeats itself until the build is complete. With layer resolutions of 0.00063 inches at its finest and 0.00118 inches for standard definition designs, PolyJet prints in the finest layer resolution of any 3D print technology.
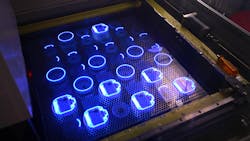
Stereolithography, also known as vat photopolymerization, 3D prints designs within a bed of liquid resin. After a thin layer of resin is evenly spread across the build platform, UV energy, directed by dynamic mirrors, cures a cross-section of the design to the build platform. This process also includes the depositing and curing of supports to anchor the design and protect delicate features. Similar to PolyJet, once a layer is cured, the build surface shifts downward and a thin layer of resin is applied to the previous layer.
Stereolithography prints in fine layer thicknesses of around 0.002 inches at its smallest and 0.005 inches for designs without specific resolutions, and its parts are built in a “green state” — i.e. they are not fully cured during printing. After they are built, parts are cured in a UV oven once excess resin has been removed.
After the Build: Post-Processing
The preparation and post-processing of stereolithography and PolyJet are similar in that they both require about the same amount of touch labor. This post-processing includes removal of support material used to create overhangs, holes or small features. For PolyJet, support generation is fully automated and usually doesn’t require alterations. Stereolithography also (usually) uses an automated software program that applies supports to the file. Then, to reduce build time or make sure a feature is built as needed, a build operator may reorient the design in a way that decreases the amount of support material. As an example, a tall and thin part would be built lying flat instead of upright, because the former’s build orientation would not need support material and thus be built quicker.
These two processes also differ slightly in how their supports are created and removed. Most stereolithography supports are breakaway supports built with the same material as the final part; any remnants from the breakaway supports are then removed by hand finishing processes — e.g. sanding. With PolyJet, supports are created with a separate water-soluble support material that’s eliminated by a water jet. After the water blasting, residue from the supports may be cleared away using special brushes.
Time is Money: Part Size Affects Build Speed
It shouldn’t surprise you that part size and resolution are big factors in determining build speed. Because they build parts differently, stereolithography and PolyJet each have their own specialties. Stereolithography is more cost-effective for bigger parts, such as housing and panels, while PolyJet is efficient for small, detailed parts.
The ideal design sizes for PolyJet are about 5 to 6 inches cubed. Anything larger significantly slows down the build process. That’s because the more surface area PolyJet’s print head has to cover to place a layer, the longer the build process will take. When time is money, the change in speed directly impacts the cost.
Stereolithography, on the other hand, uses rapidly moving mirrors directing UV energy to build parts, so it doesn’t slow down the way PolyJet does when making larger parts. The difference is big: SL can build some large parts up to 70% cheaper than if they were built with PolyJet.
Materials and Applications
Just like their build processes are best suited for certain types of parts, PolyJet and stereolithography’s materials are tailored to unique applications.
PolyJet’s ability to build using multiple materials and colors simultaneously makes it one-of-a-kind in 3D printing. Because of this, the process has developed a niche in creating color models for consumer prototyping.
Stereolithography technology, on the other hand, is used for functional prototypes, patterns, concept models etc. — especially for large parts. Additionally, it has played a big role in creating investment casting patterns. While lost wax patterns require tooling, investment casting patterns do not, thus decreasing capital costs for one-off patterns. Investment casting patterns are also built with mostly hollow interiors and reinforced outer shells, making the patterns lighter than those made with lost wax.
Stereolithography and PolyJet: The Decision
Although they share many similarities, stereolithography and PolyJet should not be used interchangeably. When it comes to choosing between the two, a project’s application should be the deciding factor for any user. Force-fitting one process for all applications will likely leave your team with more hand labor — in other words, longer build times and higher costs. It could also mean a part that doesn’t meet the performance or aesthetic expectations.
One way to iron out the wrinkles and confirm which process is right for your project is to prototype. Another is to consult with a project engineer. By allowing users to test out all the primary 3D printing processes, service providers can help your team find the best fit.
Andrew Graves is a lead additive manufacturing engineer with Stratasys Direct Manufacturing. Andrew has been working in rapid prototyping and additive manufacturing (or 3D printing) for more than 25 years and manages Stratasys Direct Manufacturing’s Stereolithography systems and operations.


